Production & filming
Framing & composition: the video that looks professional
Composition is just “where you put things in the frame” — and it's the biggest jump from “amateur” to “professional” there is, because it costs nothing: it comes down to where you stand and where you point the camera.
~9 min read

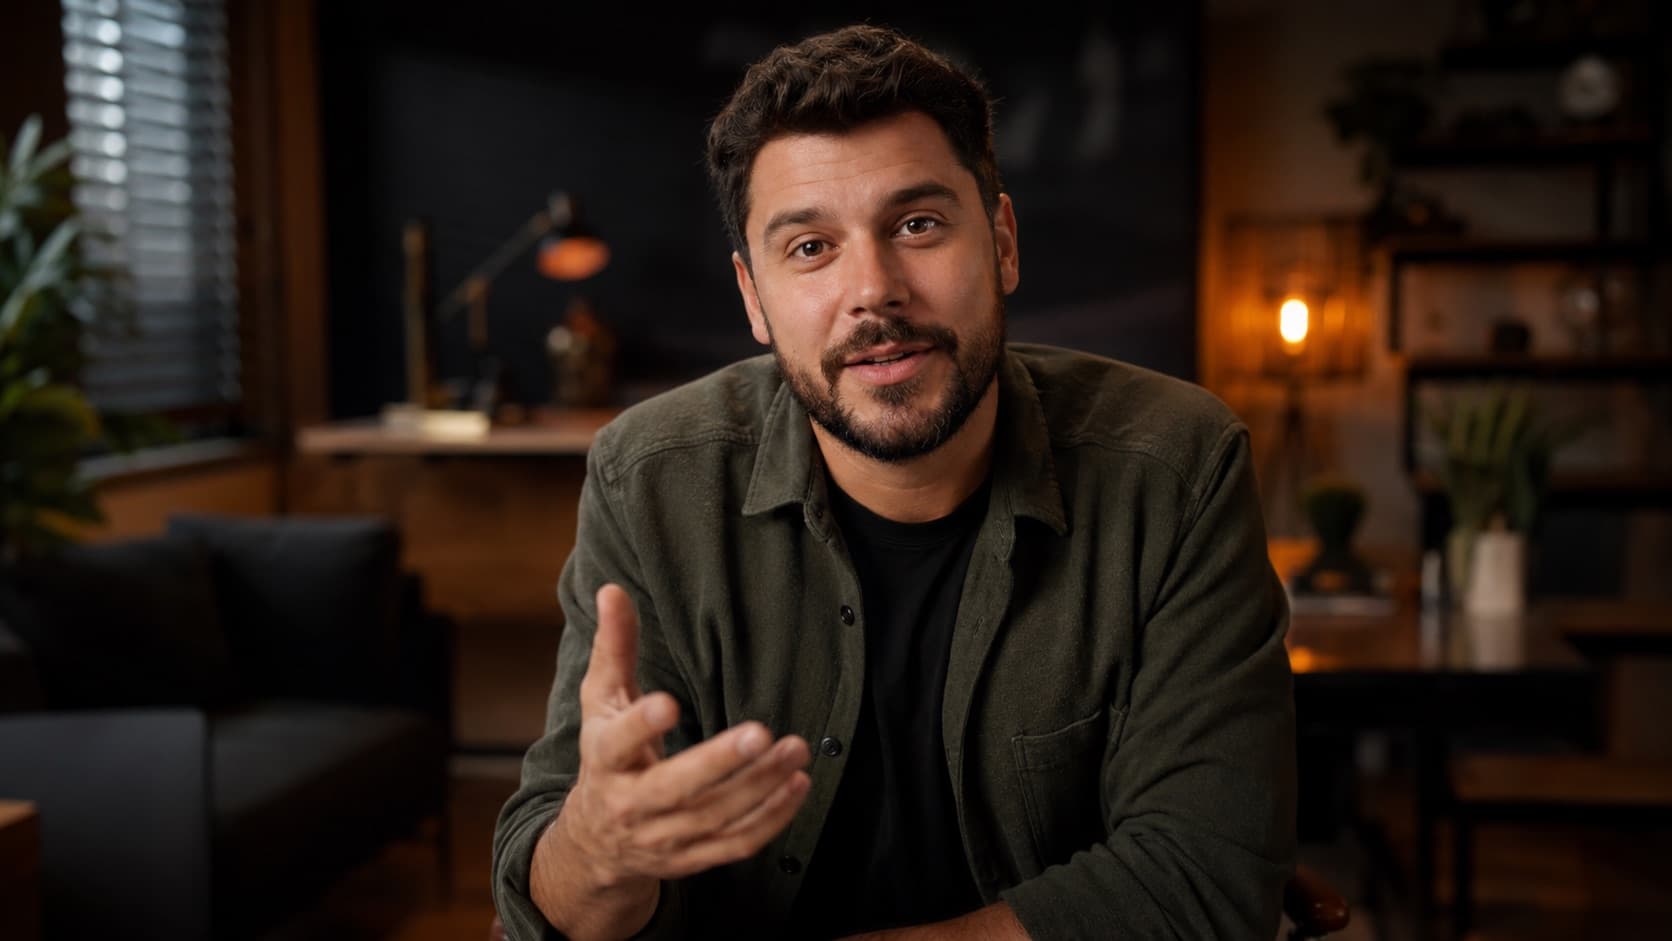
Centering everything is the classic beginner mistake — it comes out flat and static. The mantra to repeat: don't cut off the chin, don't cram the head, leave room for where the person is looking, stay at their eye level, and clear the clutter behind them.
1. Rule of thirds (and your phone's grid)
Picture the frame split into 9 squares by 2 vertical and 2 horizontal lines. Place what matters on a line — better yet, on an intersection (the 4 “power points”), never in dead center.
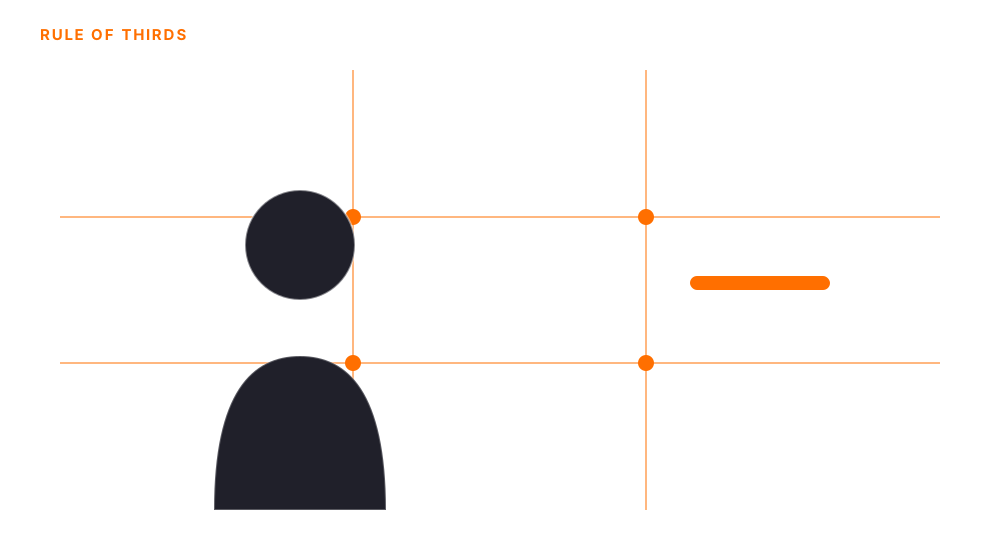

- Turn on the grid (it's free, already on your phone) — iPhone: Settings › Camera › Grid. Android: Camera app › Settings › Grid lines. It's just an on-screen overlay to guide you — it never shows up in the video.
- For talking-head — put your face on the left OR right vertical line and leave the opposite third empty — that's exactly where the name/title/caption goes later.
- The grid is training wheels, not a crutch — use it for a few weeks to train your eye; after that you'll see the thirds on your own and can even turn it off.
2. Headroom: the space above the head
Headroom is the space between the top of the head and the upper edge. Getting it wrong is the most common beginner slip:
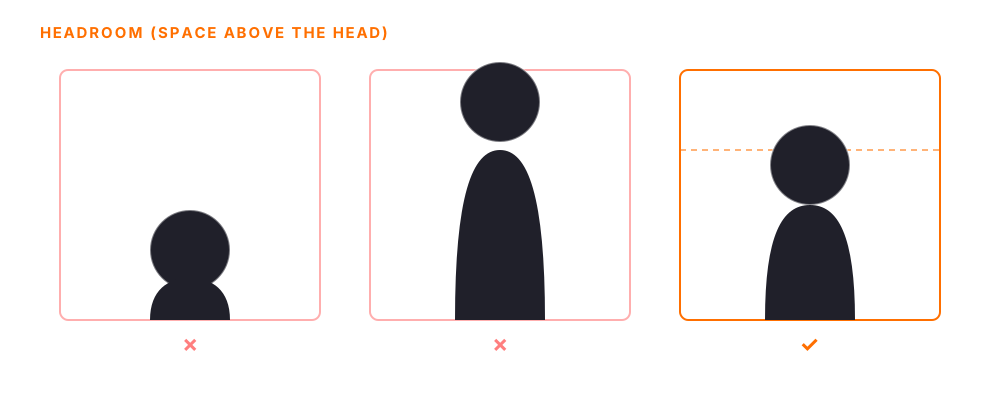
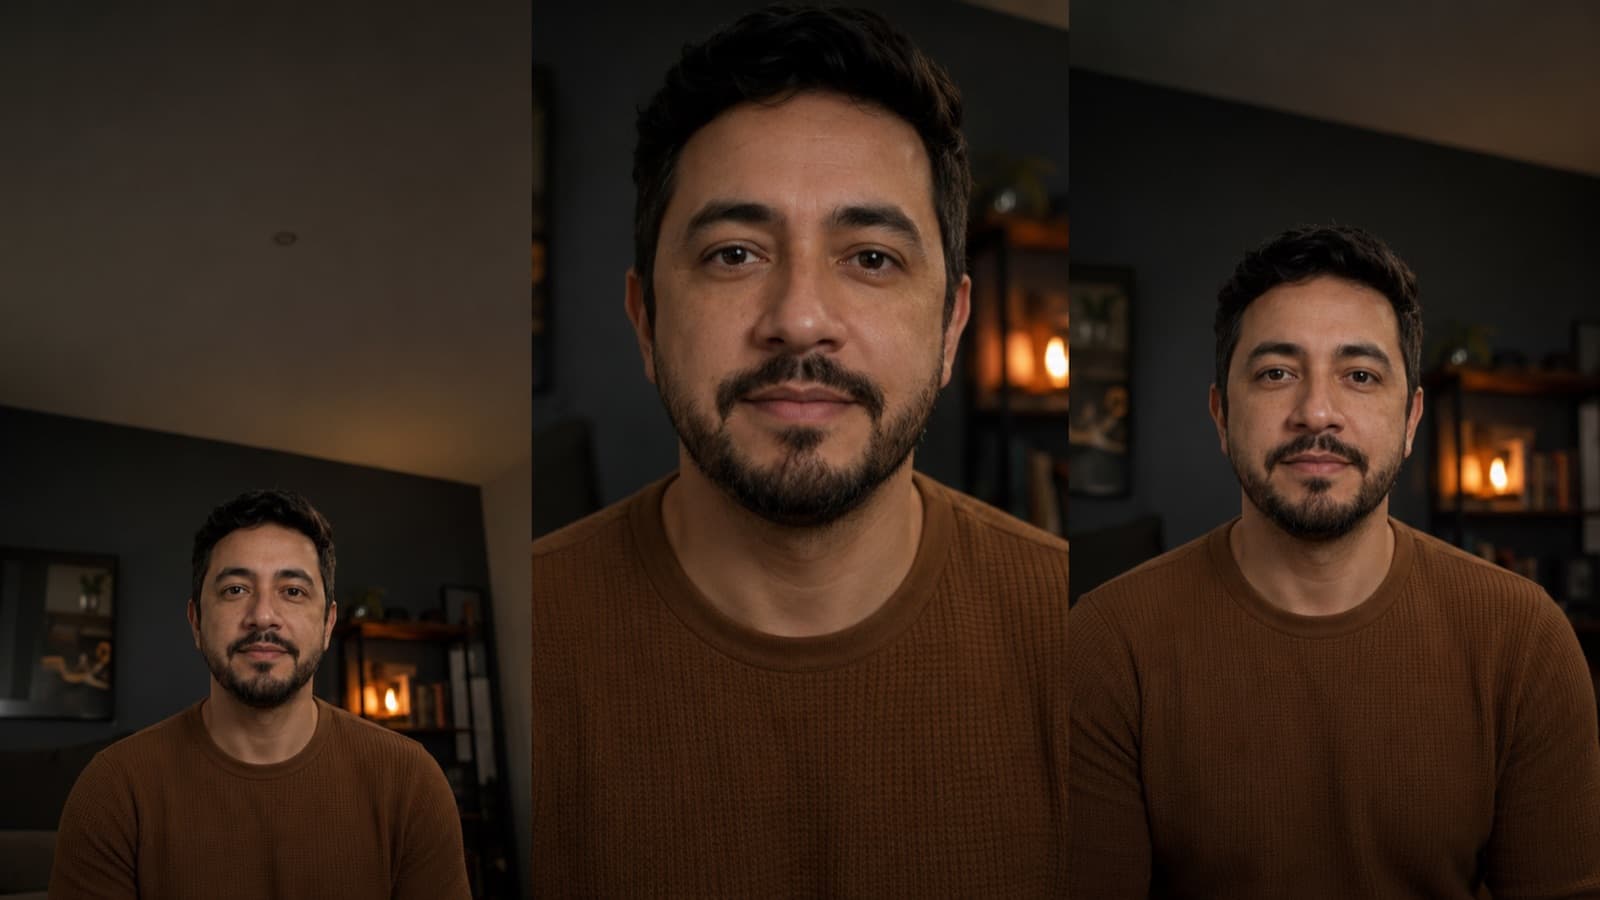
- Too much headroom — too much empty ceiling; the person “sinks,” small and disconnected.
- Too little headroom — the head is crammed against the top, no space above. If you ever need to crop to tighten the frame, crop a sliver of HAIR — never the chin.
- The pro shortcut — eyes on (or near) the upper line of thirds. Frame loose enough to see the neck and the top of the shoulders.
3. Look room — space for where the person looks (or moves)
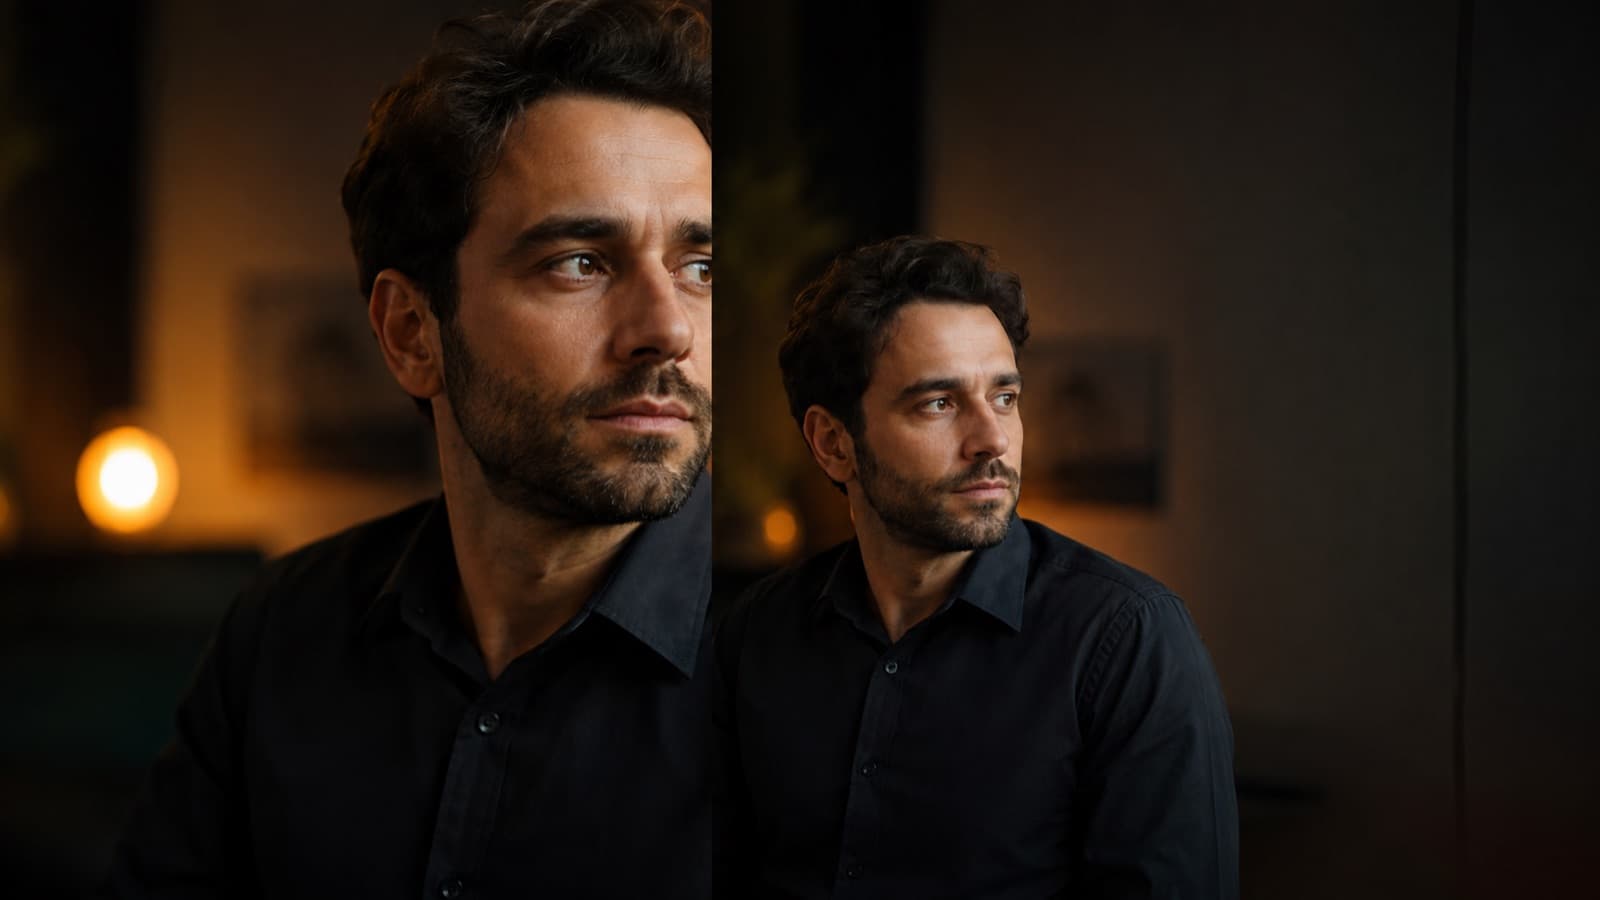
- Look room — when someone looks to one side, leave MORE room on that side (in front of the face, not behind the head). Without it, the face gets “crammed” against the edge.
- Lead room (movement) — if the child runs across the frame, leave room AHEAD of the movement — “somewhere to go.” Cramping the front stalls the shot.
- It pairs with the thirds — someone looking right sits on the LEFT third, with the open space on the right (which becomes your text zone).
4. Eye level
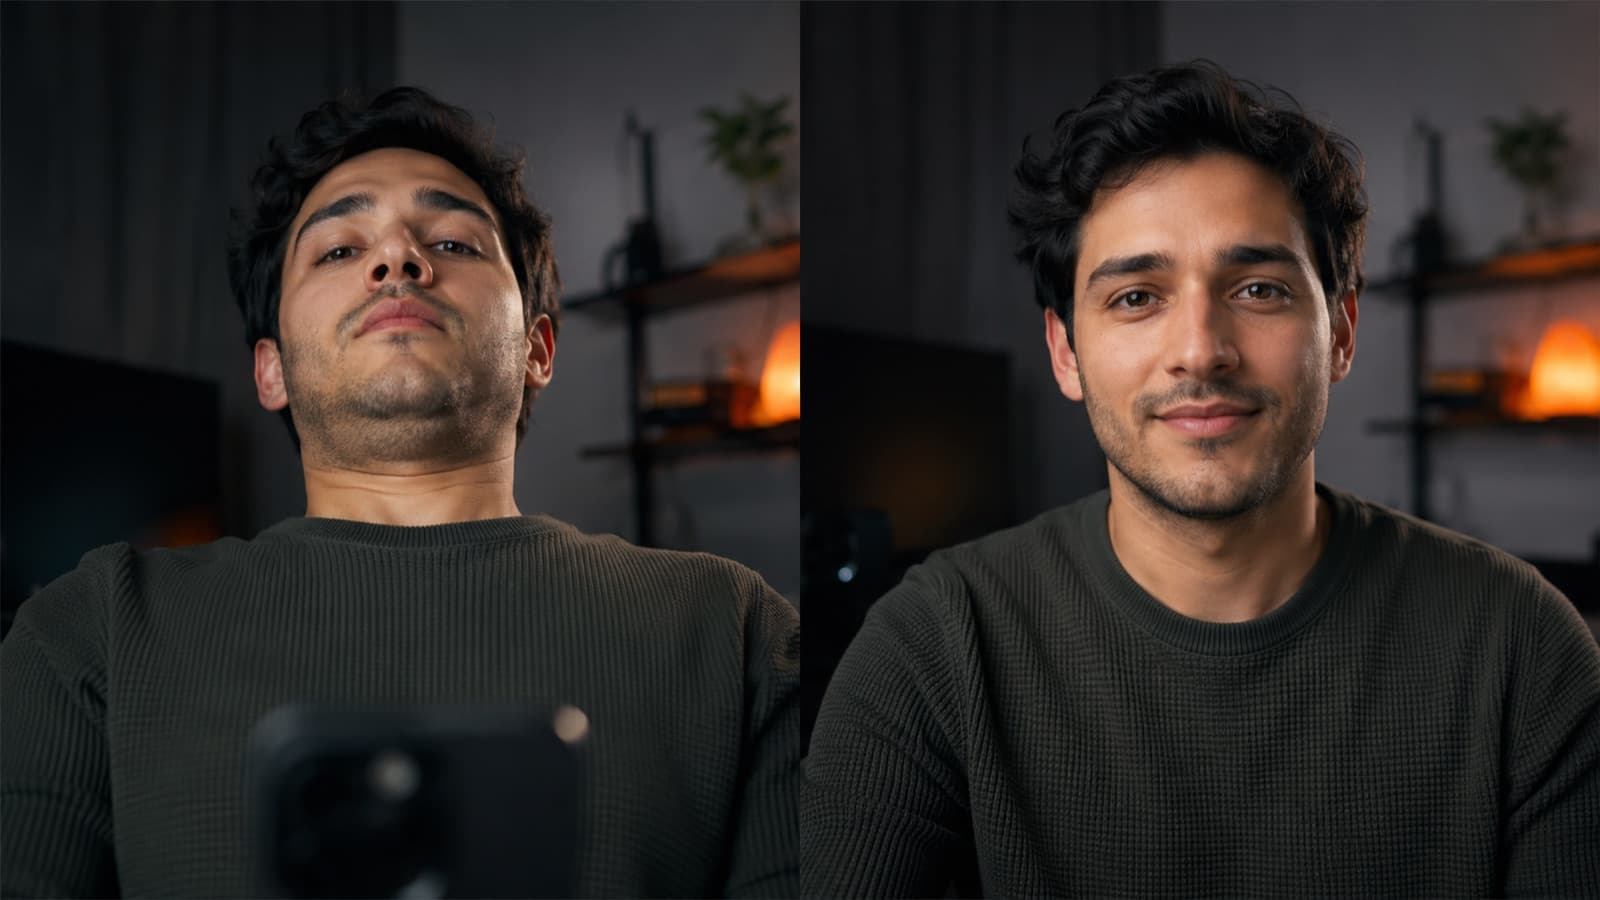
A camera at eye level is the most natural, trustworthy angle — the standard for talking-head and course videos. Propping the phone low on the desk and looking down is the number-one cause of the “up the nose” angle with a double chin. Raise the phone to your eye level (a tripod or a stack of books does it).
For a child, kneel and put the phone at their eye level — there's a whole guide on it in recording with kids.
5. Leave room for text (safe zones)
Decide before you record where the text will live (name/title, caption, “Subscribe”) and frame the person leaving that area free. It's composition + planning together — part of pre-production.
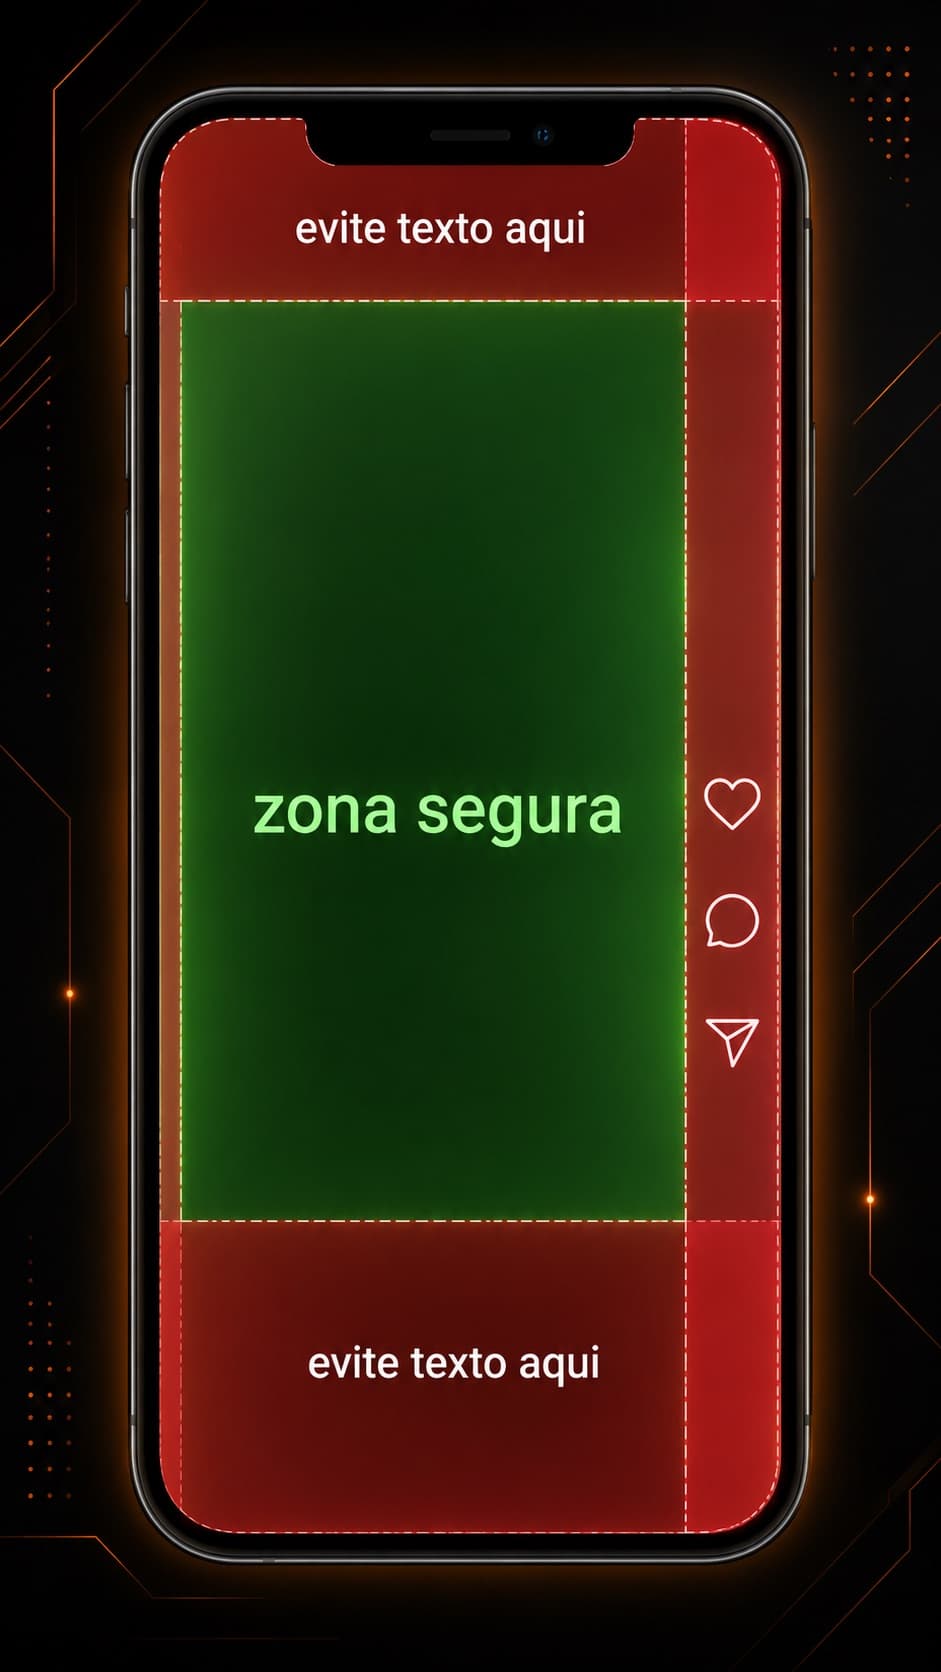
- Vertical video (Reels/TikTok/Shorts) — the app's buttons eat the frame: ~10% off the top, ~20-25% off the bottom and ~10% off the sides. Keep the essentials in the central ~80% — as a percentage it holds for any screen (unlike TV “title-safe,” which is ~90%).
- Don't put the face in the bottom quarter — or the captions will cover your mouth/eyes.
- For courses — if a “name + role” or slides are coming, leave a clean, well-lit area (a smooth wall on a third) so the text stays legible.
6. A clean background with depth
- Clear the frame — before you record, look at the WHOLE frame (not just yourself) and remove the clutter — watch for the classic “pole/plant growing out of the head.”
- Separate from the background — don't put your back against the wall — step away 3 to 6 feet. The distance creates depth, blurs the background and kills the “ID-photo” look: you “pop” off the image.
- Use the room's lines — set the camera at a slight angle to the wall (instead of straight on): the converging lines pull the eye to you, and the background stops being a flat plane.
- Blur on a phone — take a step back and zoom in with the OPTICAL zoom (works if the phone has more than one lens — most iPhones and Android flagships do; digital zoom degrades the image) or use Portrait mode — it adds blur in software (a depth map), throwing the attention onto you.
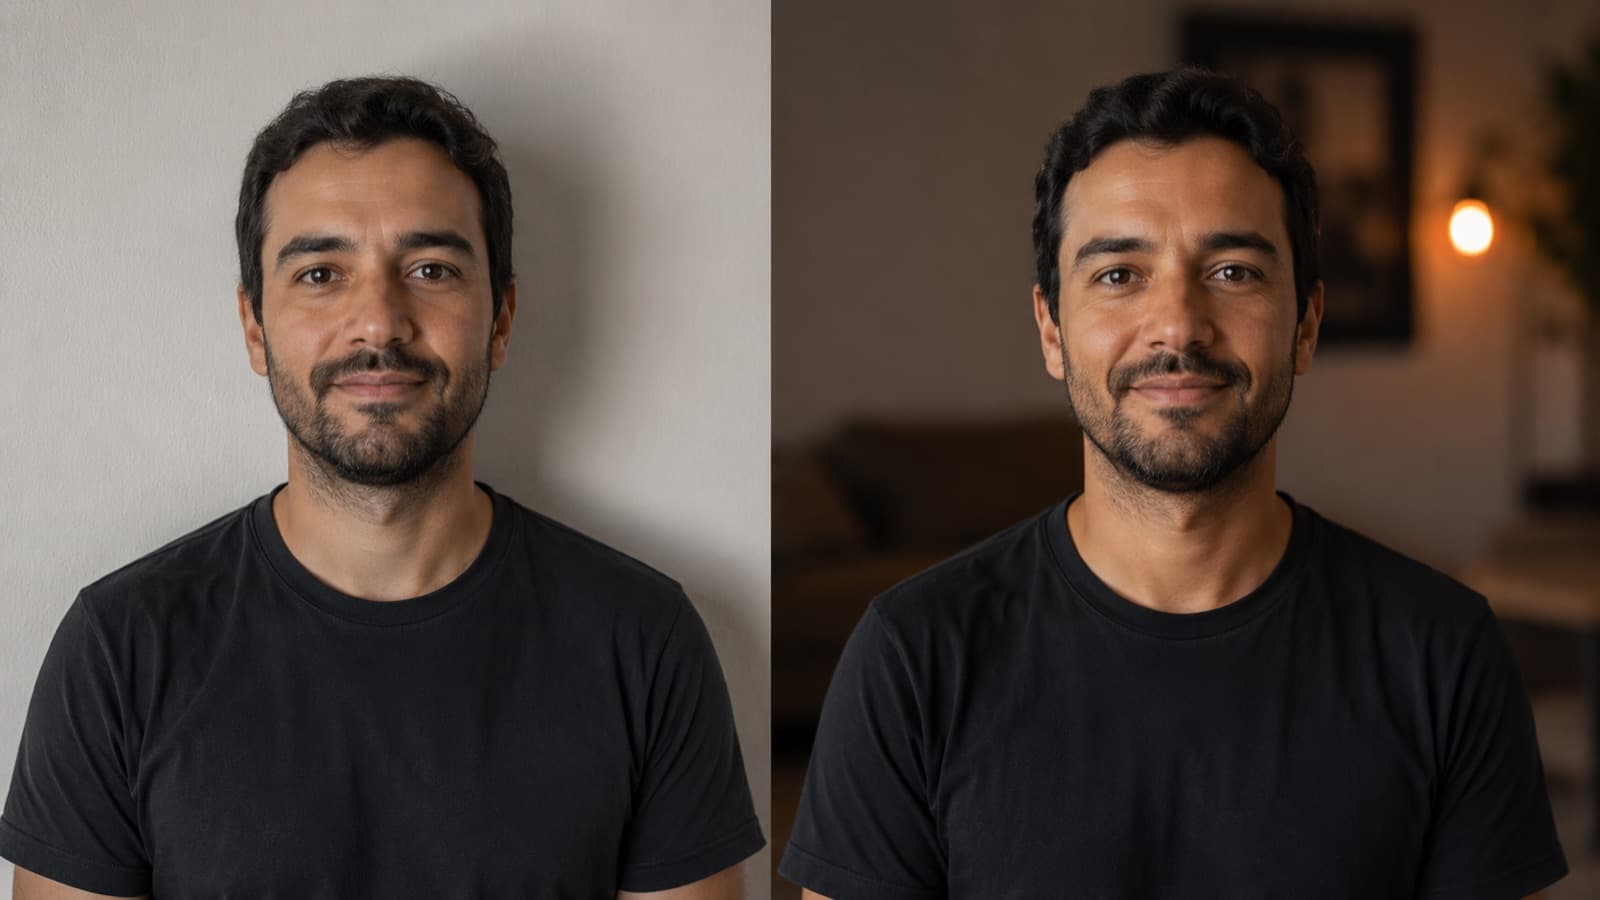

A good-looking background is also light: good lighting separates you from the room and adds depth — see the guide to lighting.
The most common mistakes (recap)
- Centering everything — it comes out flat and static — put the face on a third, with the opposite side open.
- Cutting off the chin / cramming the head — eyes on the upper line fixes it; if you're cropping to tighten the frame, crop the hair — never the chin.
- Forgetting the look room — a face glued to the edge feels suffocating — leave room for where the person is looking.
- Phone low on the desk — it becomes the “up the nose” angle, with a double chin — raise the phone to your eye level.
- A messy background or backed against the wall — clear the whole frame and step away 3–6 feet to gain depth.
Quick questions
What is the rule of thirds, and why does it work?
You divide the frame into 9 squares (2 vertical and 2 horizontal lines) and place what matters on a line — better yet, on one of the 4 intersections. The human eye finds that placement more natural and balanced than dead center. In practice: put the face on a third, with the eyes near the upper line, and leave the opposite third open for the name or caption. Almost every phone has a grid you turn on in the camera settings to see this.
How much room should I leave above the head (headroom)?
Enough that you neither cram the head against the top nor leave too much empty ceiling. The shortcut that always works: put the eyes on (or near) the upper line of thirds — the headroom takes care of itself. Frame loose enough to see the neck and the top of the shoulders. If you ever need to tighten the frame, crop a sliver of hair, never the chin.
What's the right camera height to record yourself talking?
At your eye level — it's the most natural, trustworthy angle, the standard for talking-head and course videos. Propping the phone low on the desk and looking down is the number-one cause of the “up the nose” angle, which creates a double chin and undercuts your authority. Raise the phone to your eye level with a tripod or a stack of books. For a child, kneel and put the camera at their eye level.
How do I blur the background using just my phone?
Step away from the wall by 3 to 6 feet (the distance alone creates depth and separates you from the background), then take a step back and zoom in with the optical zoom — it works if your phone has more than one lens, which most iPhones and Android flagships do. Digital zoom degrades the image. Another option is Portrait mode, which adds blur in software (a depth map). Good lighting helps separate you from the room even more.
Where does the Reels/TikTok/Shorts interface cover the video (safe zones)?
The app's buttons and text eat the edges of the vertical 9:16 frame: roughly 10% off the top, 20–25% off the bottom and 10% off the sides. Keep the essentials — face, important text — in the central 80% or so. As a percentage, that holds for any screen. Decide before you record where the text will live and frame the person leaving that area free.
Why shouldn't I center the person in the frame?
Centering everything tends to make the image flat and static — it's the classic beginner mistake. Putting the face on a third creates movement and balance, and opens up the opposite side for the name, the title or the caption. The exception is intentional symmetrical framing (the person exactly in the center of a symmetrical background), which is a style choice, not the everyday default.
Sources
- Videomaker — Framing Good Shots — headroom, look room, lead room, eye level.
- Neil Oseman — Lead Room / Nose Room — the space for where the person looks.
- StudioBinder — Eye Level Shot — eye level as a neutral, relatable angle.
- Video safe zones — what the apps' interface covers — the central ~80% rule.
- The ASC — Shooting the Talking Head — background separation and depth in the interview.
Composing the frame is on you at the moment of recording; reusing that space — reframing, opening up room for text and graphics — is part of how HEY JOE thinks about every cut in the edit. The natural next step is camera shots (which distance and angle to choose); and if you appear on camera talking, see how to speak well on camera and thumbnail and title.